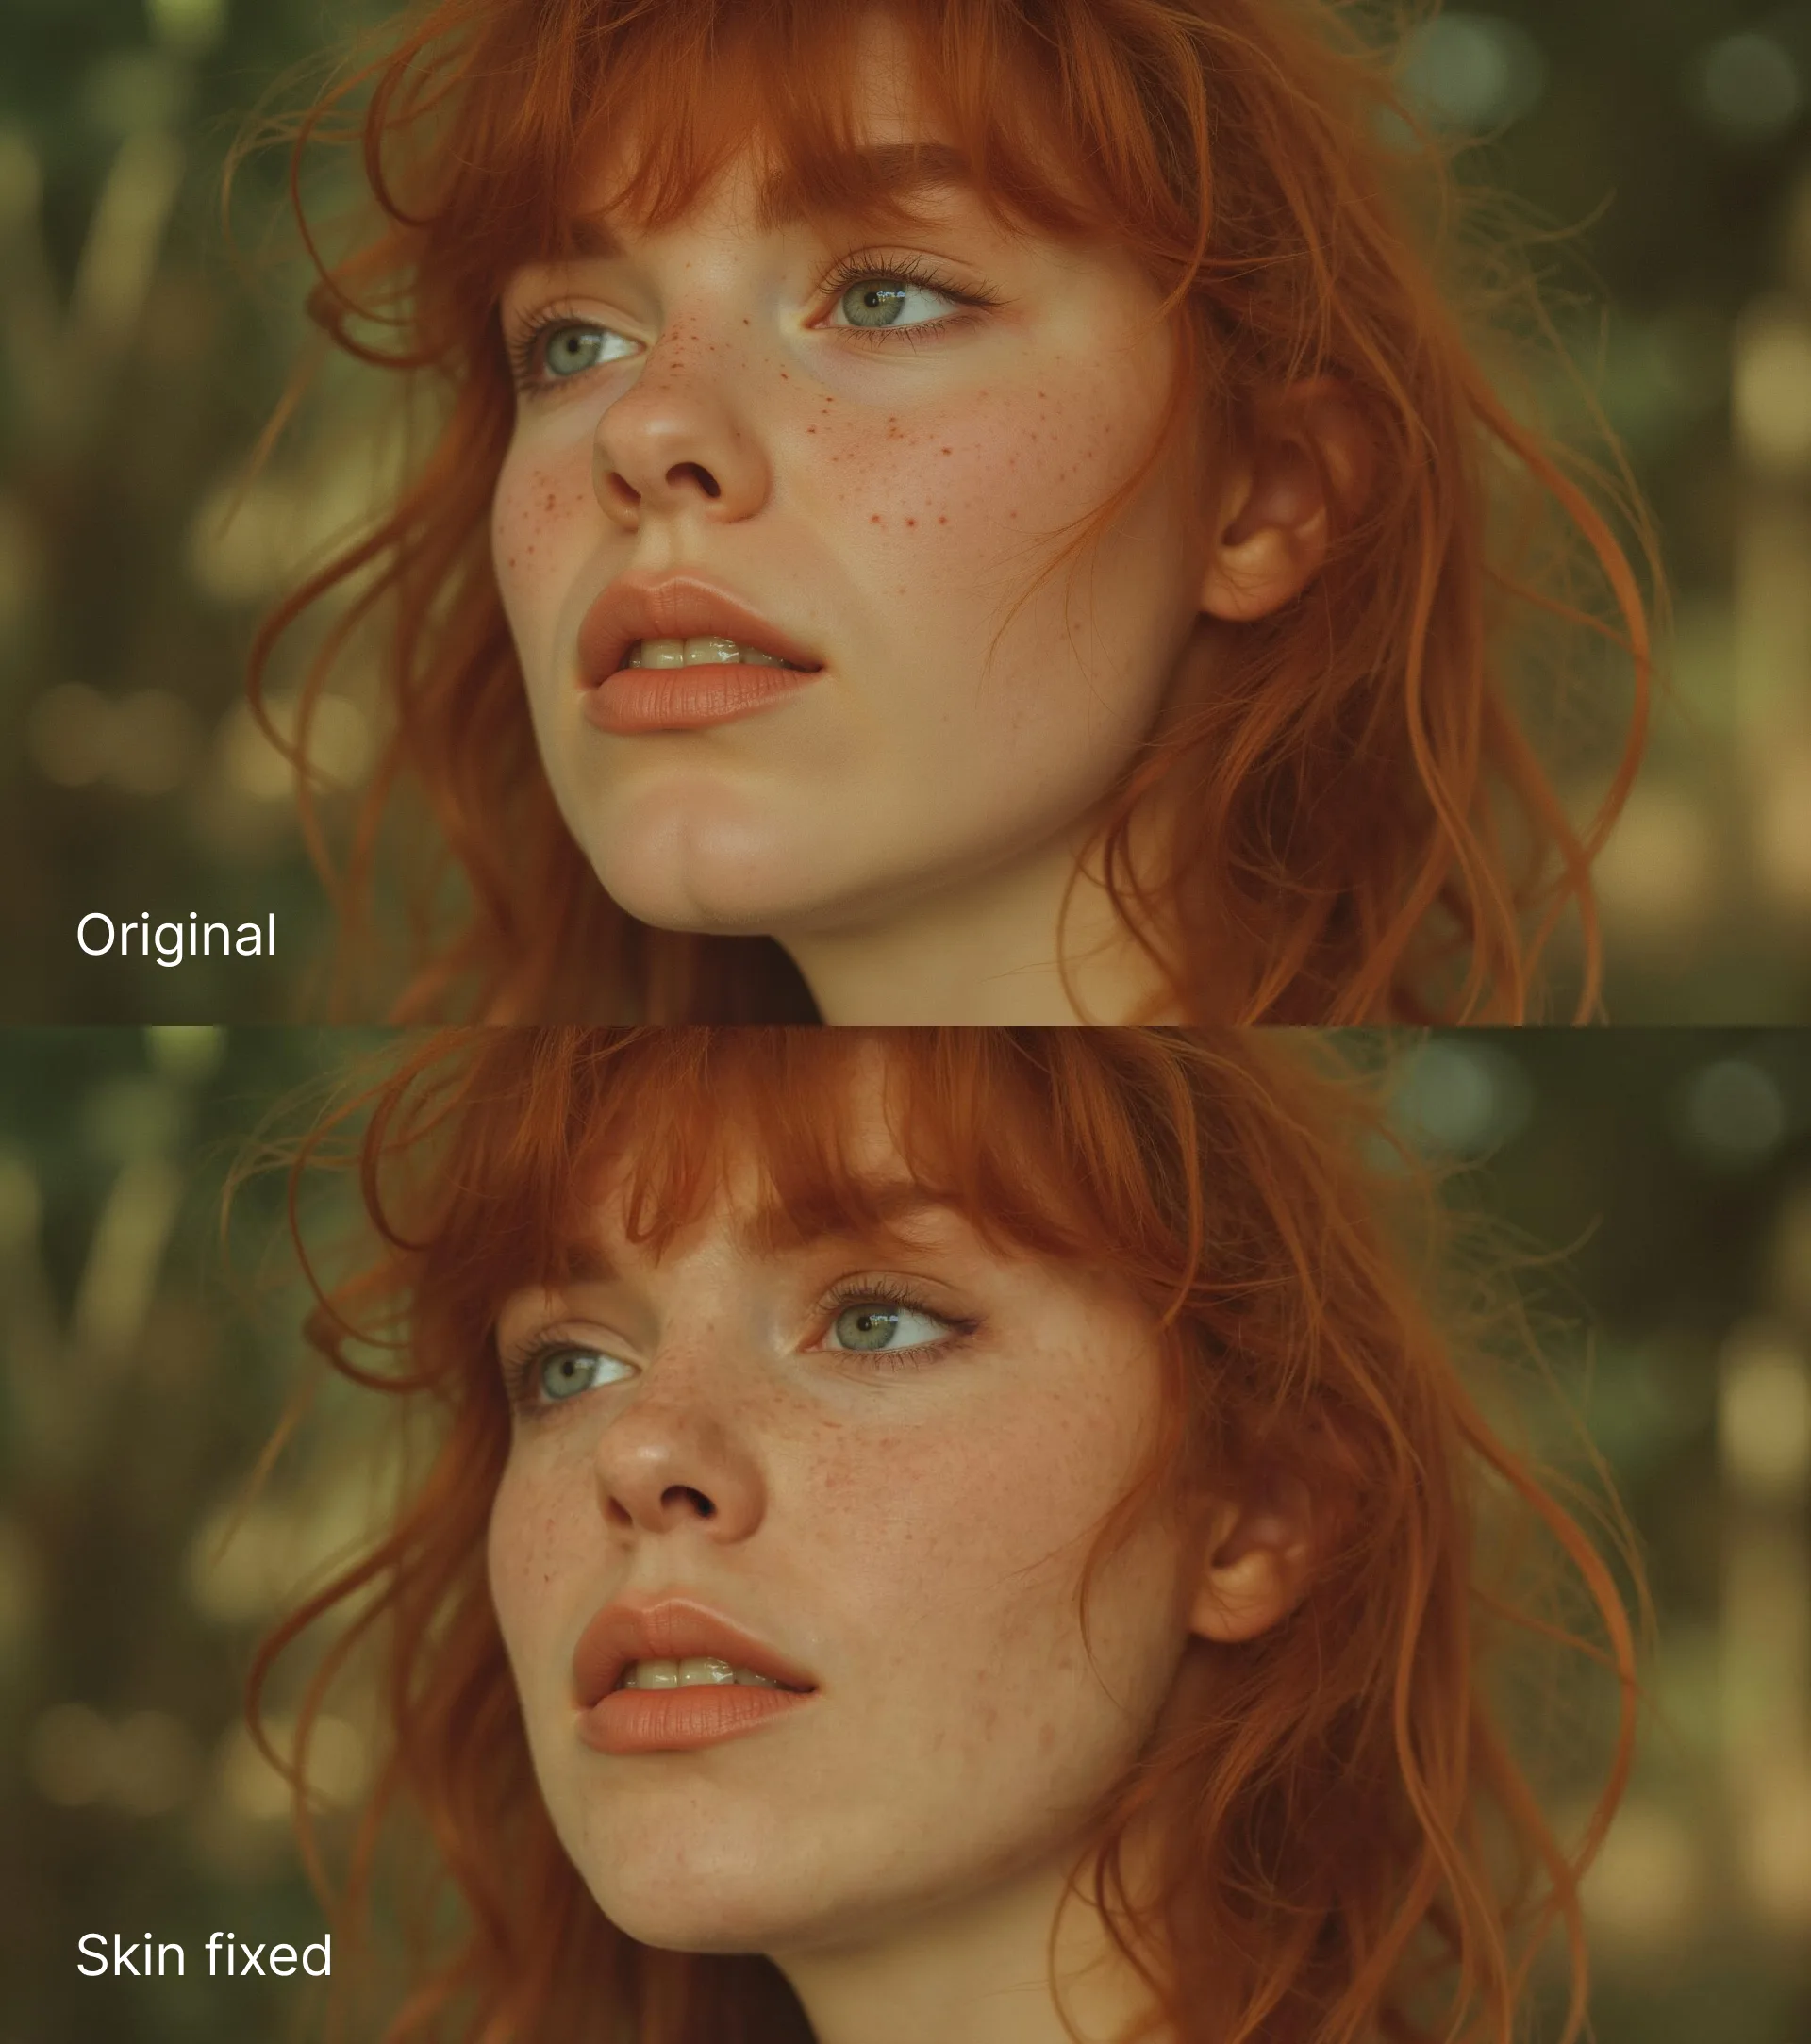
Using "Skin Fix", you can turn plasticky AI skin into more real-looking skin, while keeping the consistency of your characters intact.
Here’s how to use it in a few simple steps 👇🏻
First things first
- Visit https://letz.ai and log in to your account.
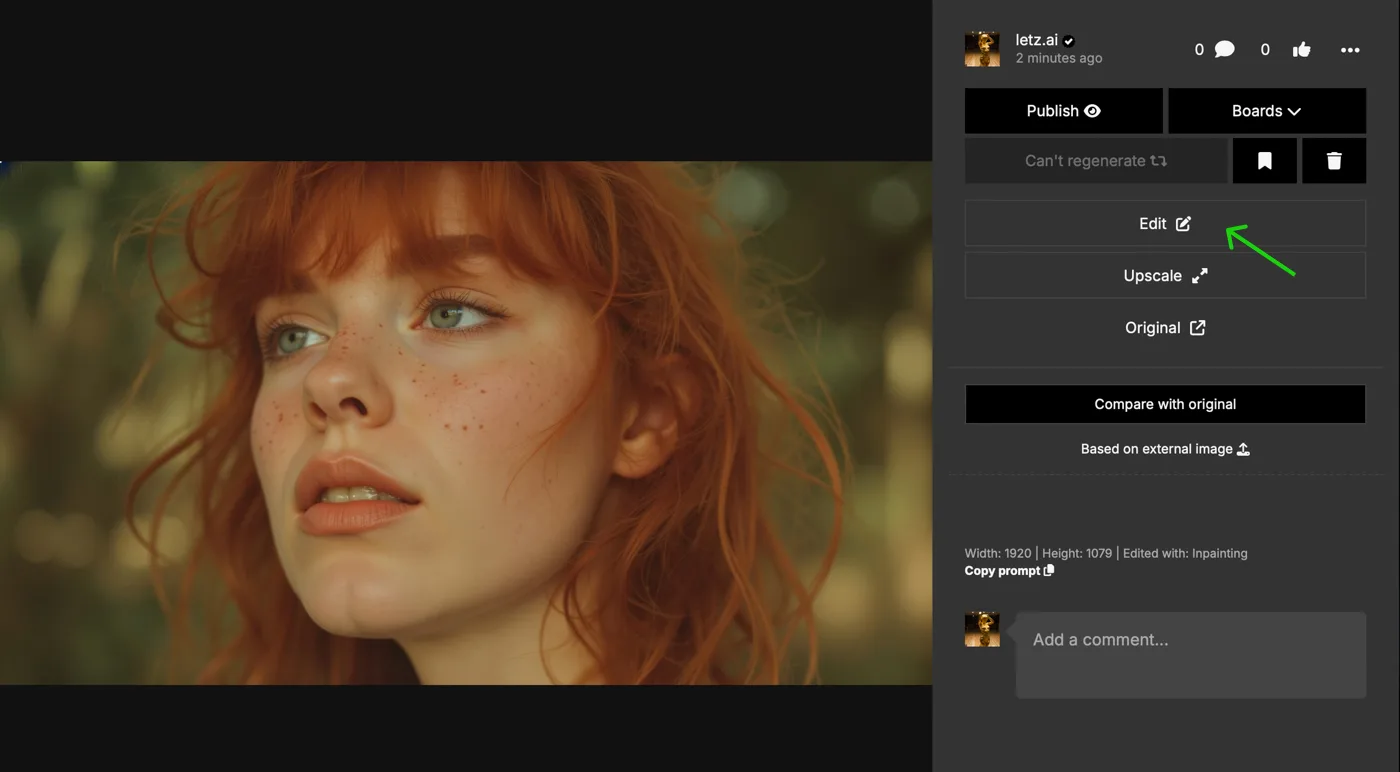
- Open "Edit" mode and upload your image, or select an existing image from your LetzAI account.
- Select "Fix Skin" from the menu on the right.
Open the Edit Menu
-
Either select the "Edit" tab from the menu on the landing page to upload a new image to the platform or select a previously generated image on the platform...
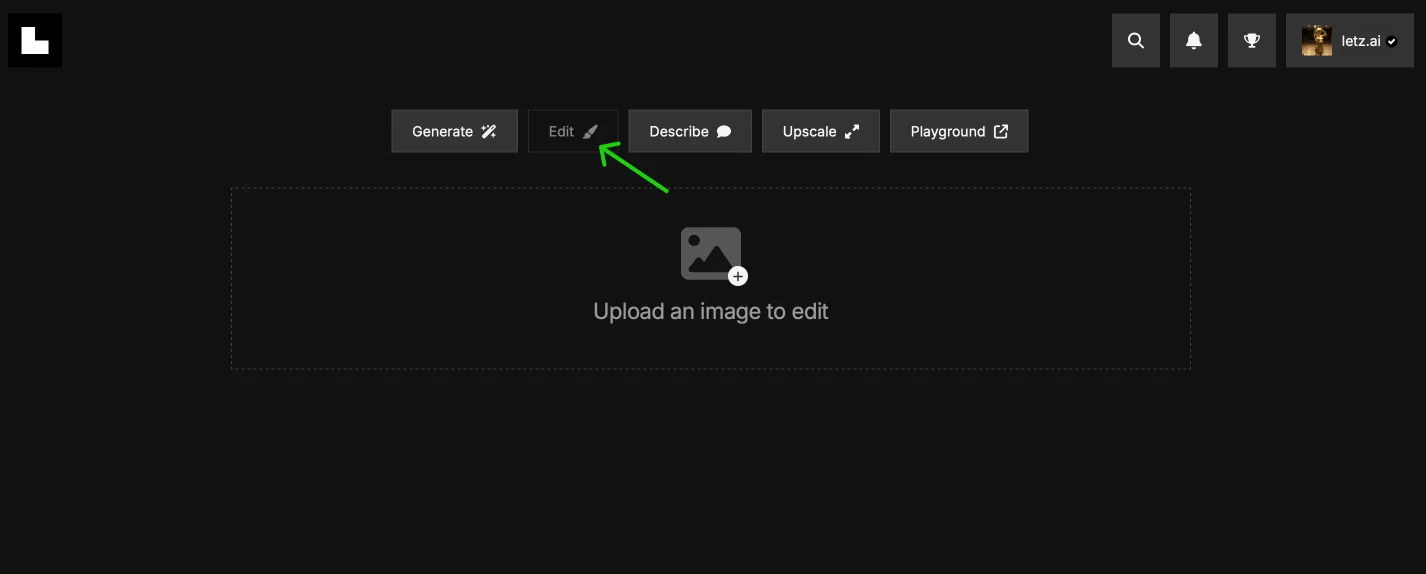
...and click on the "Edit" button:
Choose the "Fix Skin" Tool
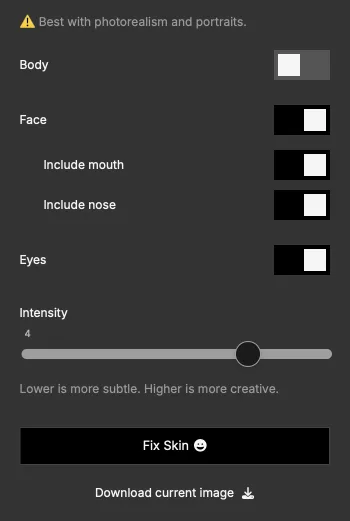
- In the Edit tab, navigate to the box on the right and select the "Fix Skin" option.

Customize Settings
Select from these settings:
- Body: Applies the effect across the entire body, perfect for full-body shots (though results may be subtler).
- Face: Targets facial skin for the best detail enhancement.
- Additional Face Options: Customize your edit by including or excluding facial features like nose and mouth. These are excluded by default to keep the original likeness, but including them may noticeably change the look, so adjust carefully to achieve your desired result.
- Eyes: Enhances the eyes specifically, correcting blurriness or refining details without affecting the entire face.
- Intensity Scale: Gain more control with the Intensity scale from 1 to 5 — lower settings for subtle enhancements, higher settings for more creative results.
Apply the Changes
- Click “Fix Skin” to apply the realistic effect.
- This process will take around 10 seconds. The fixed image will appear below the original in the interface.
Review and Repeat (Optional)
- Review the result. If you’re not satisfied yet, you can rerun the process multiple times to further improve the skin. Each run costs 10 credits (~$0.02).
- Caution: Multiple runs might change the original look, so balance enhancements with keeping the character’s likeness.
Recommended Workflow for Best Results
For the highest level of detail, we recommend generating your portrait image in Sigma Mode, then applying "Fix Skin" and upscaling to enhance resolution and details. Try applying the fix before or after upscaling to find the best order for your image.
⚠️ Note: If you upscale an image and then click "Fix Skin", LetzAI will not edit the upscaled image directly. To use the upscaled image, you will need to download the upscaled image first and re-upload it to the Edit menu, then apply "Fix Skin".
Tips & Advices
- 💡 Use it on older AI-generated images that didn’t meet your expectations to give them a second chance.
- 📸 You can also upload and enhance real photographs, especially for smoothing imperfections like rashes or pimples.
- 🍉 Additional NSFW Benefit: The tool also improves the appearance of nipples.
- 🙅♀️ Limitations: Avoid wasting credits on illustrations or images with barely visible people and small faces, as the tool is not designed for these cases.
Stay Up-to-Date
We're continuously enhancing 'Skin Fix' and other features at LetzAI. Follow us on X and don't miss a thing! Happy creating ✨